Gunnar's Suzuki GT750J - Restoration Log File |
This page contains the restoration 'diary' for my Suzuki GT750J showing the situation at
a certain date.
To see the latest news, scroll down to the bottom of this page.
Enjoy ! /gunnar
|
some shown here.I also imported a used exhaust system from Denver, Colorado, UPS freight costs exceeded the price of the mufflers. I no longer own those mufflers, I traded them part of a deal when I got the chance to get a set of new mufflers, see log file below for details on that. |
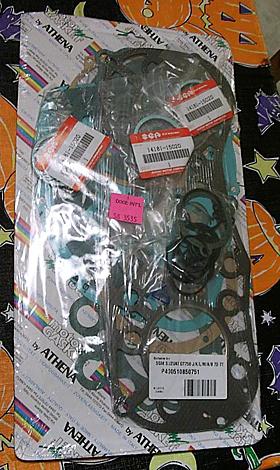
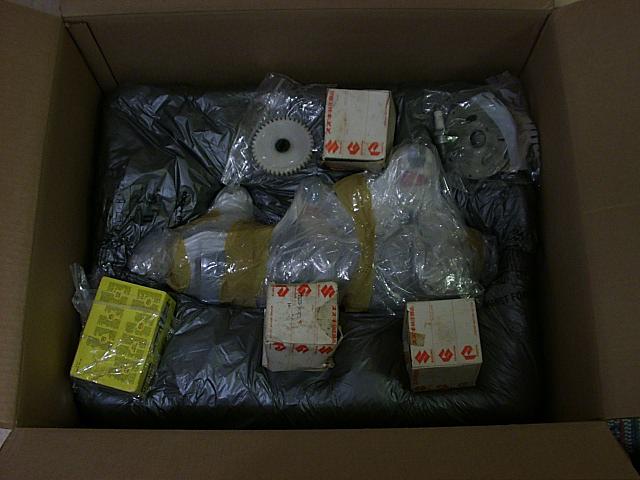
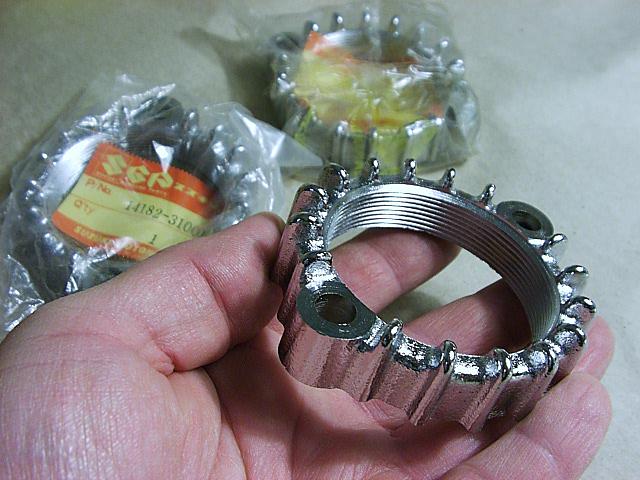
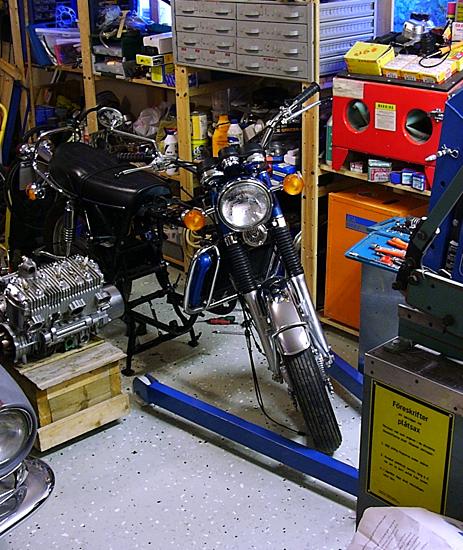
March 04 - Pipe Dream came true :

I was able to aquire from a swedish GT750 owner a complete never mounted original exhaust system
incl. all items of the parts catalog exhaust page, as new parts. I traded all the pipes (two sets) and exhaust
parts I had already paid unreasonable money for + more cash to secure this treasure. At March 04 I had still to
install and use this NOS exhaust set for the first time. The perceived condition of this type of two stroke model
depends largely on the condition of the exhaust system. I sold some company stock and this fortunate extra income
made it possible to carry out some aggressive parts gathering (see below) that normally wouldn't fit my income.
Some parts of the NOS exhaust system is shown here
![]()
April 11 - Bridgestone tires :
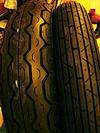
The Swedish Bridgestone importer helped me order these from Japan, identical to those factory
mounted on the Kawasaki W650 retro model. These have a classic look and are new products. Rear tire profile is
slightly lower than the GT750 original, but it's wider and makes better use of the width of the rear fender.
April 12 - Actual work has begun ! : Rear wheel came off surprisingly easy. Getting the 18 year old rear tire off was more work but it finally came off.
April 15 - Work will continue with misc work. here is a list; polishing rear hub and rim surfaces, replacing swingarm bearings, rear brake pads and drive chain/sprockets, repainting underside of seat, sandblasting/repainting of battery tray. Next phase will be replacing steering head bearings, fork oil, front brake pads, refinishing of steering head satin black surfaces, reassembly of repainted instrument panel, steering cable straps, engine cover polishing, water hose clip refinishing, replacement of center stand and side stand springs. general frame/engine cleaning up, refinishing air cleaner box, new filter, repainting carb hose clips and new screws for these, replacing side cover emblems, fitting a replacement starter clutch assembly, sending the exhaust pipe flanges to rechroming, fitting and contaminating the NOS exhaust for the first time, trueing/balancing of front wheel rim, replacing tires, and fitting of various parts.
May 1 - well not much of the above done yet. But I sandblasted/repainted the battery tray, very nice result. Waiting for some parts to arrive, will have bike ready for the road before end of May.
May 4 - took digital camera shots of the new mufflers (see above), I guess I should have been working on the bike instead.
May 5 - COLOR MY WORLD
!!
Original color paint can arrived. Click on image to visit the
Candy Jackal Blue Suzuki Can-of-Paint worshipping page
May 6 - Some
further parts illustrations here
May 12 - Swingarm sandblasted and repainted in satin
black finish,
May 13 - Center stand and misc other frame parts
refinished, pictures from May 12-13 here![]() .
.
May 15 - GT750
J Air Cleaner restoration. Metal parts sandblasted/repainted. Plastic parts cleaned up.
New filter.
May 20 - Side cover preparation for candy paint.
I'm grinding down the paint to expose the silver layer, will then apply a new silver paint layer and the candy.
When all looks well a clearcoat will provide a finish. Water cooled emblems and CCI decal completes the job.
May 23 - Picture ? Of course, see silver painted cover here. The thriller will be attempting to spray
the candy on top of that. And if that doesn't wrinkle up, the final clearcoat may. Or the choice of candy thinner
might destroy everything.
May 28 - Installed swingarm, rear wheel, rear
fender, seat, NOS rear lamp, Radiator removed for sandblasting/repainting.
May 31 - Tapered steering head bearings installed.
June 1 - Sand basting/repainting of steering head
and radiator. Drive chain
and chain cover installed.
June 2 - Cooling fan cosmetic restoration!! This
gadget rarely turns on so the fan blades looked like new after cleaning up. See picture here. Lots of other detail/reassembly work done.
June 4 - Walked a large nail into one foot and
pressured blood streamed out ! Delayed the progress a few hours..
June 5-10 in the U.S (CA) on a computer conference
and was on June 09 able to visit Ray Meyers who lives in the Monterey area. Ray owns a number of wonderful GT series
and RE-5 bikes in various stages of work. Pictures
here !
June 17 - Attempted to repaint side covers ! Went fine, until the fatal mistake..
June 24 - Starter clutch repair. Impossible to
turn any of the screws holding the left engine side cover. I had to drill the screw heads off all ten screws to
get the cover off. Screw studs were then easy to remove. The cause for a previous rattling noise and oscillating
vibration at low revs was identified: The large three Philips screws holding the starter clutch assembly together
had come loose. Also one of the needle bearings was damaged. I was lucky last winter to come across a replacement
starter clutch and it came handy now. I noticed also the nylon 'idler gear' has those commonly mentioned cracks
on it but it looks like it will be usable until I find a replacement.
July 09 - Painting of side covers attempt #2 succeeded rather well. See pictures from the whole Candy Jackal Blue paint shop story here.
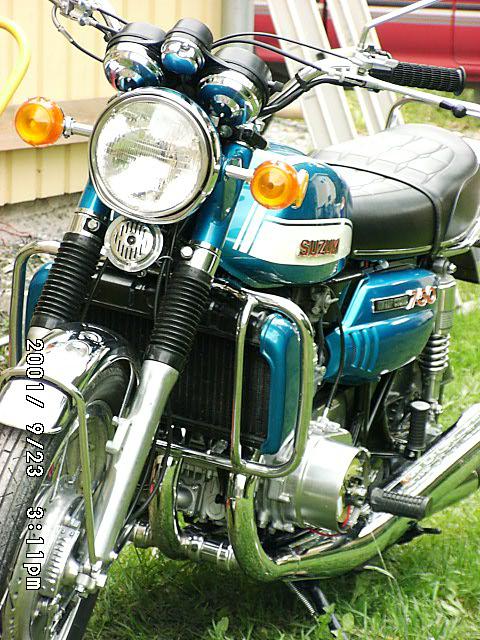
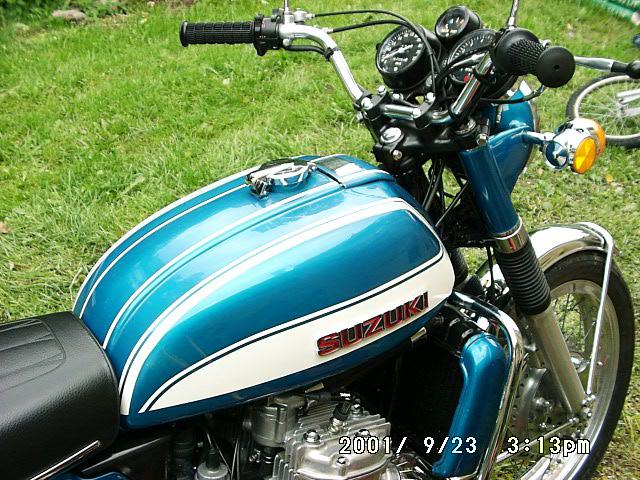
July 10 - The restoration project 'Phase 1' is now almost complete. Remains to install the front tire, front brake shoes and cables. Here are some more photos of the bike in its current state. Sunlight contrast conditions were a bit tough for the digital camera on that backyard lawn so some pictures appear a bit washed out. Enjoy these ones for now :
 Tank and side covers didn't need repainting. Cylinder barrel + head has not been polished, that's part of 'phase 2' when the engine will be out of the frame. |
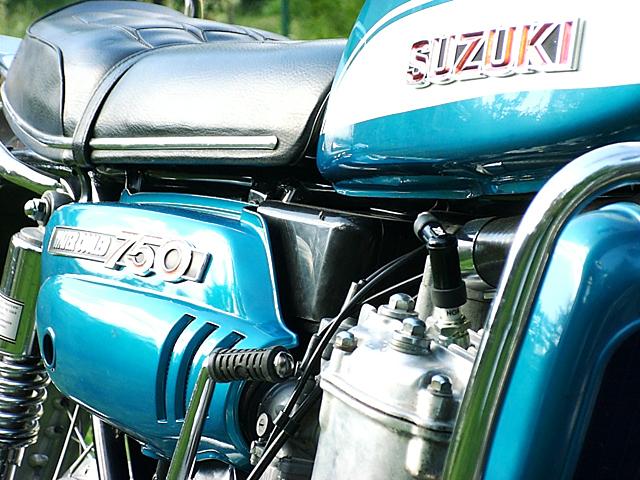
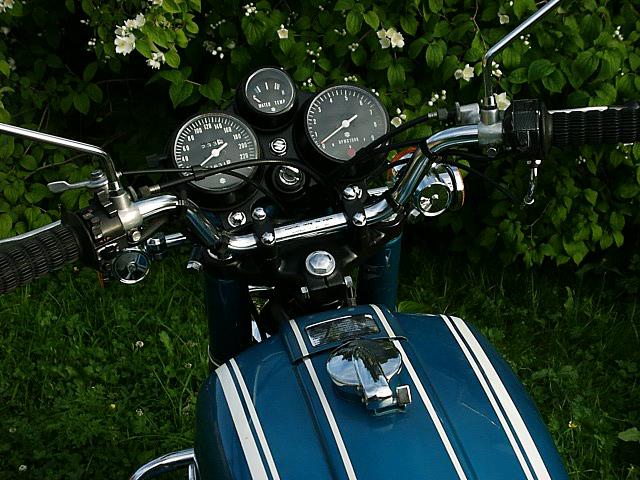 The original cable clips and warning stickers in place. |
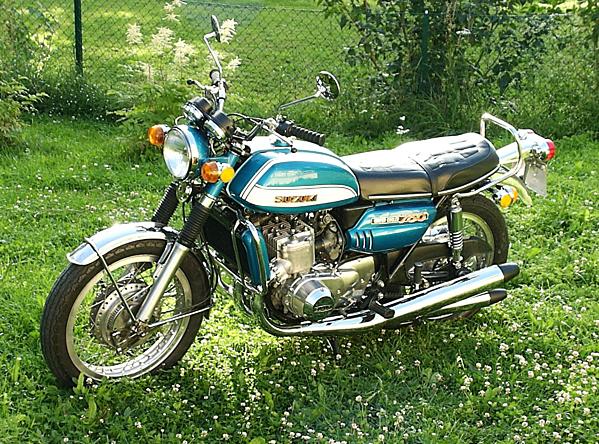 Front wheel/brakes not touched so far (front tire from 1982), and the Akront alloy wheels will remain for a while. |
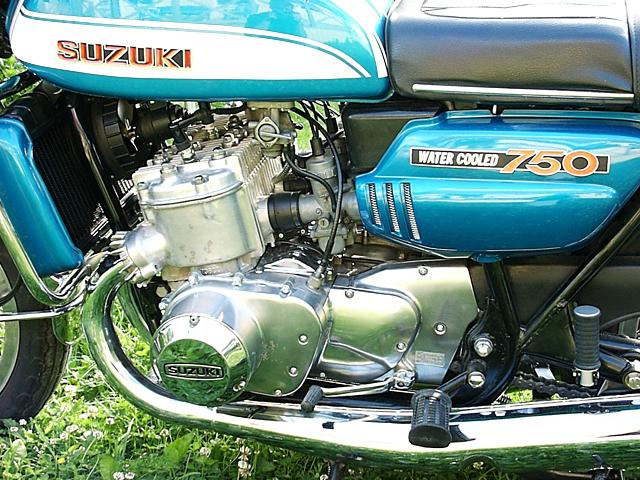 Engine side covers polished/clearcoated. |
 Brochure-like lighting conditions.. |
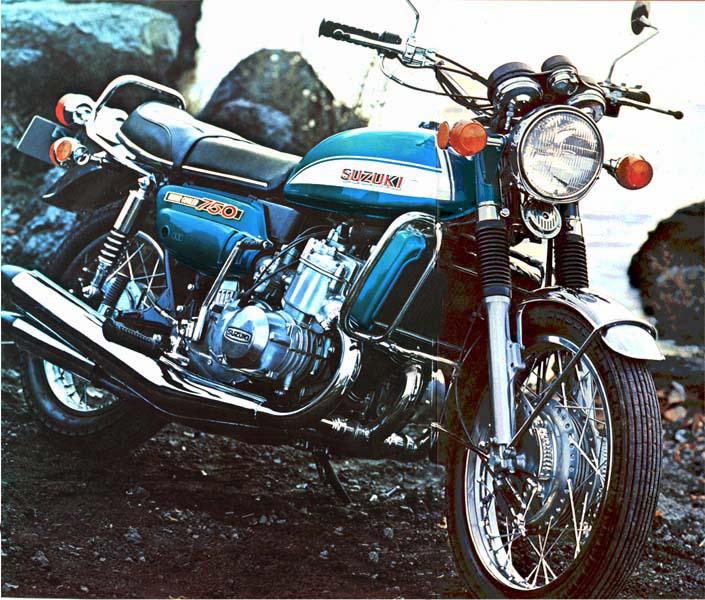 This original Suzuki photograph serves as a good reference.. |
![]()
| Qty | Part no | Description |
|
4 |
34951-31012 | BRACKET, speedometer |
|
4 |
34972-31012 | COLLAR, speedometer |
|
2 |
34960-31012 | PLATE (chromed covers under the gauges) |
|
1 |
34200-31602-999 | TACHOMETER ASSY (NOS) |
*** Sept 10 - have found all of the above parts. ***
I later sold this set to Arne Markussen in Norway who is now winning all norwegian concours contests with his GT750K !
September 09: Here it is ! For actual use, see September 10 below.
August 24 - I have found the above listed K gauge mounting parts and the NOS K tachometer (!). Eventually I may try using them on the bike or will keep them as trading items.
Front fork jerkiness - the left fork tube has spots where the chrome surface is worn off and there is scratches around where the tube enters through the fork slider bushing. This causes a jerky fork motion and a bad road behavior. Riding with a stiff front fork is no fun. I am in the progress of finding a replacement fork tube. I have found a new fork slider.
*** Sept 10 comment - Have found two NOS fork tubes so the forks will end up in good condition. ***
August 28 - Have located a NOS fork tube, this is good news regarding the rideability of the bike. Will install a U.S model handlebar. One worthwhile exception from original specs: I have found a 70's Kawasaki steering damper and will find out a neat way to install it on the bike. I'm in negotiation getting a good clutch drum and gear clusters from a donor engine with less than 6000 miles on it. Have located a H4 headlamp insert. So the winter project looks promising.
*** Sept 10 comment - intermittent bearing 'rustling' noise at low idle comes from the gearbox. If I select a gear and keep the clutch pressed (input shaft to gearbox not moving) then the noise will not appear. It's not the clutch drum bearing. Some work for the coming winter. I am having gear clusters from a donor engine shipped to me now so this will be taken care of. ***
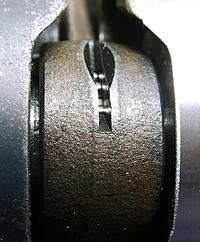
September 08 - Replaced timing camshaft bearings,
but it turned out these weren't the source for the engine noise I am hearing sometimes. I now suspect the water
pump.. I'll figure out where the sound comes from later during the winter..
Here's a picture of pulling one of the timing camshaft pilot bearings: Simple DIY tool used, made in China. But
it did the job.
Didn't work on the smaller bearing which has too rounded edges on the center hole. Using a suitable size socket
from the other side and with some careful blows from a hammer I got it out. A hydraulic press would be the appropriate
tool for that bearing.

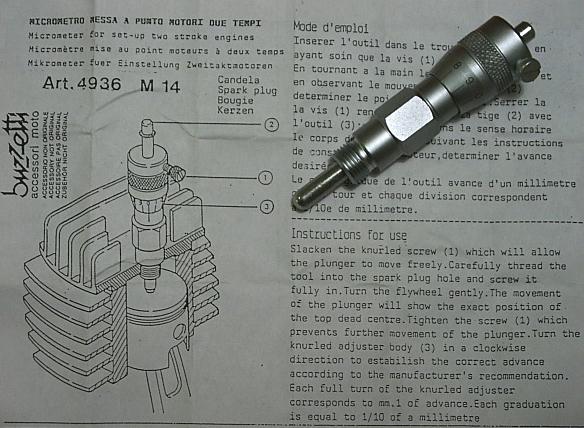
September 10 - Did ignition timing setting using the above illustrated piston gauge. Turned out the rod going through the tool is a bit too short for the GT750 so I had to remove the rubber O-ring on top of the rod to use the full length of it. Caution is then required to not drop the rod into a cylinder where the piston if at the bottom of the stroke because it may become difficult to get it out of there.. So by making sure the piston was near TDC I could use the tool safely. The ADVANTAGE is that the rod can be locked at TDC so that after the micrometer screw is turned down, for example the 3.64 mm for outer pistons, the piston can be turned upwards slowly until it stops against the rod and that gives a distinct positioning. I did not use lamps or a ohm meter to find the position of opening breaker contacts but observed the spark across the spark plug electrodes for arriving at a setting where the spark appear exactly at the measured piston position. The setting procedure takes quite some time and is a methodic trial and error procedure requiring dedication and patience. It is a good idea to connect a battery charger across the battery so it doesn't run out. One cannot depend on turning the breaker camshaft to approach the timing position but the crank itself should turn the camshaft since there is a small slack in the pin driving the shaft. Turning the crank can be done slowly using the kick starter or turning the alternator rotor. I won't go into more details of the timing setting procedure but can testify the resulting settings felt very accurate and were NOT identical to those obtained when using a strobo light against the timing plate ! The result was a bit more performance, and a smoother engine operation, less bucking and a more even idle. So the conclusion is that this tool is fully usable for the GT750 with the only minus being that the rod was about 5 mm too short so I had to use it without the safety-stop O-ring on top of it.
October 15 - I used a timing dial gauge for the first time now and the settings I had accomplished before, using a mechanical micrometer tool, appeared a bit incorrect (too little advance) on this gauge. I now used a japanese 'Teclock' gauge kit that I located on Ebay a while back during my search for the 'real thing', the Suzuki tool.
See http://www.medial.se/suzuki/ignition/tools.html
It is not specifically intended for the GT750 so the plug adaptor is a bit tall. The gauge
just about fits under the tank when used for the middle cylinder.
I set timing on all three cylinders to exactly the figures of the factory manual, and there is a marked performance
increase when all three cylinders now contribute equally strong !!
When I began the adjustment I noticed the left cylinder was already perfectly set. I noticed
earlier one the road that I could sense that the left part of the motor was working harder, a more marked exhaust
note on that side. After the adjustment it was easy to sense that the other two cylinders were making more inlet
and exhaust noise as well due to their higher power output. So I'm happy now with the kind of power output I get.
All three plugs now show the same color on the electrodes when examined. So I recommend not looking at any other
option than this type of gauge. Strobing on the timing plate will not assure locating the optimum timing for peak
power output.
As I mentioned before, when advancing the crank towards the point where the plugs fire the crank should not be
turned using the timing shaft, but should be advanced so that the crank is turning the timimng shaft, not the other
way around. Without the correct timing you won't accomplish peak power. I observed the resulting setting will be
up to 0.4 mm off the setting obtained by the other approach. I've successfully used the kick starter for turning
the crank during the setting procedure. My latest favorite method is gently turning the rear wheel in fifth gear
! This CAN be done so that the gauge needle travels real slowly across the dial. I use a ring spanner on the timing
shaft to back down the crank for each dial gauge trial run.
What remains now on my bike is
1: overhauling the front fork, one of the tubes is scratched and the fork locks up irregularly resulting in quite
unpredictable road behavior.. But on the straights this bike now flies ! Due to the jamming fork I don't trust
it for any real action in bends yet and after all I am merely a Sunday afternoon touring type of rider. So far
I am not that impressed with the bikes road holding qualities despite the overhauled swingarm and tapered steering
head bearings. I still assume the jamming forks are mostly to blame. I now have all the parts needed for overhauling
the forks, even a NOS fork slider..
See http://www.medial.se/suzuki/fork
2: Will take the engine apart this winter to have the crank rebalanced. I am expecting
this to really restore refinement.
I also have a set of gearbox gear clusters from a donor engine coming in that will hopefully be good replacements
for the ones I have which make certain rustling noises sometimes at low revs and there is a whine on low revs in
5th gear.
GT750K Instrument page updated - New pictures
Horse Shoe Shaped headlamp sub project !
Ignition timing page updated with illustrations of making your own timing dial gauge
Page showing the new set of rims I found for my Rim Replacement sub project !
Review of Newtronic 'SU6' Electronic Ignition Kit for Suzuki GT triples !
Front fork overhaul page updated
Transmission gears and clutch drum arrived !
Imported from the U.S, from a 'less than 6000 miles' donor engine.
November 22
Side cover restoration ! I am repainting these side covers for a GT750 friend
who I got the above gears/drum from, as a returning favor.
I do not normally do restoration work for anybody else, but getting hold of the
above engine parts was worth a lot to me.
I'm in the process of importing this crankshaft, three new pistons, new water pump gear(!) + more from the U.S (surface shipping).. This is for 'phase 2' to take place this winter.
I also now have these
engine bearings and crank seals,
supplied by Reiner Schneider, Germany (GTReiner1@aol.com).
Front fork jerkiness problem solved! Turns out two spacers are missing on the front
wheel axle and this pulls the fork sliders towards each other when the axle nut is tightened, resulting in a jerky
suspension travel. This amazing discovery brings new hope to this bike being capable of some roadworthy behavior
next summer. Best news in several months !!
Before I found the real reason for my fork problem I now installed a second NOS fork tube as well 
so now both tubes are replaced as well as one of the outer tubes. These came from Vintage Parts at about $55 per
tube.
I am getting a restored J/K seat from Eldorado Seat Restoration in Adelaide, Australia.
It is supposed to be in correct concours appearance according to restoration craftsman Tony O'Connor. It will travel
surface mail so it will take some time until it turns up here.
I hope to be near the end of my parts acquisition activity now. This parts gathering business can't go on forever
;-|
I can now go through the parts catalog over and over without finding anything I really need so that is a good sign..
I will have the engine apart this winter and likely something turns up there but otherwise this should be it for now.
A GT750 J/K seat I ordered from Tony O'Connor (Eldorado Motorcycle Seat Restoration, Australia) mid December has arrived. Authentic replica seat cover and appears brand new in every detail. See pictures here !
Cannot tell if crank is rebuilt or factory new, at least the primary gear, con rods and
bearings seem to be new.
I will send it to a crank rebuilder for checkup before I try using it.
See also this page that help identify GT series crankshafts. Contains info about
the later model crank shafts
and the use of thrust washers on newer type pistons.
February 22, 2001
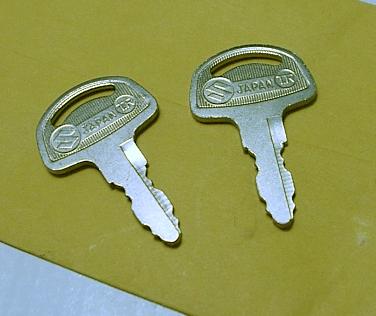
Tiny toolkit wrench located ! Thanks to Chip Miller who came to the rescue.
May 1, 2001
Long time no see ! See completed side
cover restoration work
I have restored the handlebar switches with new paint and mounting screw, including orange paint on lettering..
I have repainted the headlamp brackets and horse-shoe-shaped headlamp bucket in Candy Jackal Blue.
Completed these side covers also for a friend, almost too good
to let go of ;-)
I got a NOS headlamp ring and sealed beam reflector so this looks brochure authentic now.
Current status is attempting to get the cylinder block off. A hard residue has built up around the studs that
go through the block
and I need to get this material out before I can get cylinders off.
I've had a special tool manufactured
(by Swedish tools manufacturer CombiTools), much inspired by the drawing on the Smoke Riders site.
It's a slightly revised model, it will be exciting to see how it works to solve the problem. I will attempt
using it this week. I had five (5) of these made to reduce the cost per tool. I have three
such tools for sale now at $30 + shipping, total $40 to the U.S. or Australia. You need to cut the teeth at the end of the tube before usage, that was left out in manufacturing
to keep the cost down.Contact me if you are interested in one
of these tube shaped drills.
See this page for illustration. It also shows
the Extractor Tool I made to pull the cylinder block !
See also this page that shows
tuning attempts done by some previous owner....
I stripped the engine, no real problems except the water pump made some resistance. I was able to tie a rope(!)
around the axle and pulled using a automotive engine hoist. I applied most of the engine weight as a pulling force,
penetrating oil, some heat. Also there are a pair of small notches at the end of the pump housing so I could rotate
it a bit back/forth and finally it came out.
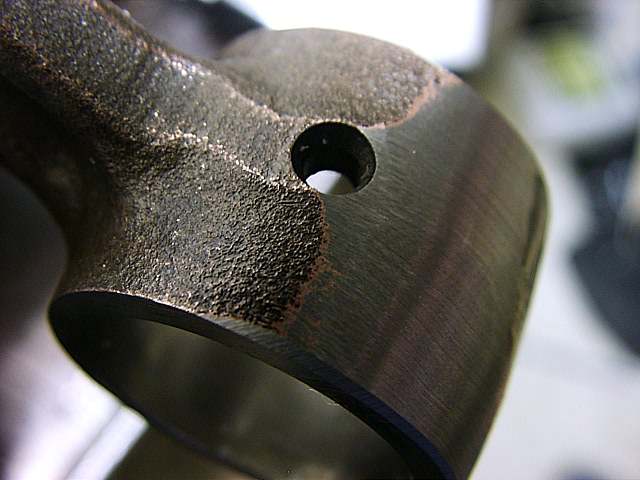
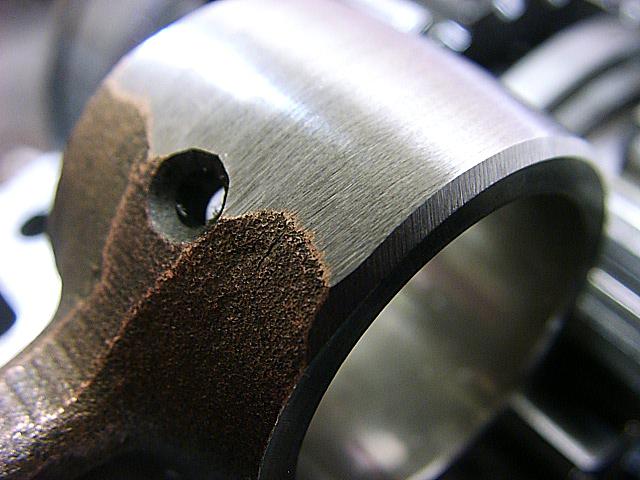
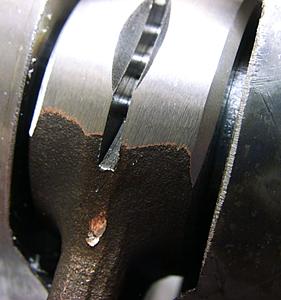
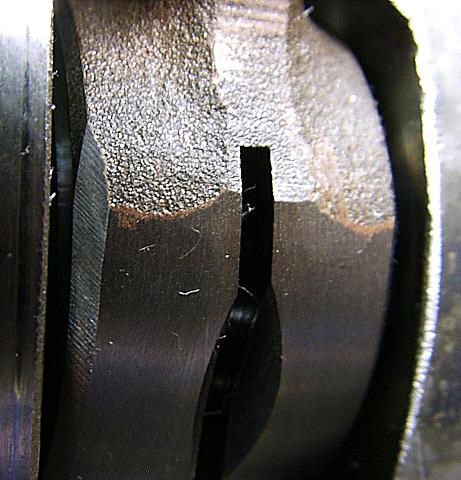
The case was easy to split, and I found the main defect I was looking for. The 5th gear has LOTS of play on the
axle, this was what caused a wobbling/vibrating phenomena that used to appear when revs go below some 1500 rpm.
The gear comes into a sideways vibration due to the excessive play. The vibration/rumble used to go away when the
engine was revved up. Also I used to have a problem with a whine/noise when accelerating in 5th gear from 'too
low speeds'. Probably the bike has been used too much in accelerating from low revs in top gear, hence the wear.
A fortunate thing is I've got a complete set of gear clusters from a "<6000 miles" donor engine and
they seem to fit well in the case. 5th gear on that one has very little play so it looks promising.
I will replace gearbox bearings, install another
clutch drum from the donor engine and possibly install
the rebuilt crank that I got a while ago. So much of the engine
internals is being replaced.
I will have cylinders rebored to 2nd over dimension.
Page that illustrates removing the gearbox bearings
Wow ! Some progress, I cleaned up the engine case. Most people you ask would not recommend sandblasting the
case top and bottom surfaces due to the difficulty making sure no particles remain inside the case. But I think
I was very successful cleaning it up. The drawback is lots of work making sure the case is absolutely clean from
any particles.
I cannot recommend this to anybody, you need to be able to spend time and posses suitable cleaning resources..
Took me two days. This page tells
the story !
Sent the cylinder block and a set of three new 1.0mm oversize pistons to EBOS for cylinder boring. Package weight was 13 kilograms (26 LBS ?) and shipping was comparable to $18 (means not that expensive to ship within Sweden). EBOS is the leading Swedish specialist on two stroke engine work. More news in some two weeks.
Visited Ray Meyers in Monterey, California and was able to try out a few of his Suzuki motorcycles. See this page.
I haven't had time to describe the progress lately, here is a summary of what's going on.
Engine block halves repainted silver engine paint. Rebored cylinder block back from EBOS, looks great. I will repaint
the cylinder block also. I was able to remove a leaking SRIS hose union also and have found a source for a new
one. I have three new 1.0mm oversize pistons/rings to match the block.
I have sent the crank I imported last year to EBOS for balancing. I intend to install this crank in the J engine, in fact most of the internals of the engine is really being replaced..(gears, gear shifting shaft, clutch, crank, pistons, oil injection lines, various bearings and seals, expansion tank, clamps that hold the wiring harness, ignition coil assembly..rear tank strap, rear fender plastic front part, I am going to install the entire gearbox contents of a "<6000 mile" donor engine. Paul Wirth in Ada, Michigan USA, another GT750 owner, has been kind to send me the gearbox and clutch components of that engine part of a good deal. This gearbox stuff is really fresh. I repainted his side covers a while back also. I'm down at the bolts-washers-and-clamps detailing level so the engine will look fresh on the outside also. I'm waiting for some small parts to arrive before I can begin reassembling the gearbox. I will begin work on the wheels also, I'm replacing the old alloy rims with new original steel rims, I will attempt to build the wheels myself using a 'lacing-a-rim' guide I found on the VJMC mailing list. They say listening to the radio or TV when doing that work works equally well.
I hope to have the engine ready during July but am not sure about the entire bike.
Updated page about painted engine case, now shows appearance after paintjob.
Repainted frame. 2-component gloss black.
Process was
1. Clean off any grease or other dirt (not shown)
2. Sand blast off any rust. Working outside on a cover works fine. On a calm day about 80% of the sand ends up on the cover and can be collected for re-use. If you use a cover the size of a football stadium you can assure that ALL sand particles can be salvaged :-)
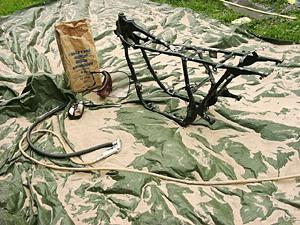
3. Painting. You need access to the frame all around when painting. I mounted it on ropes between a ladder and a corner of the house. Suitable M8 bolts screw onto the frame to hold the ropes.
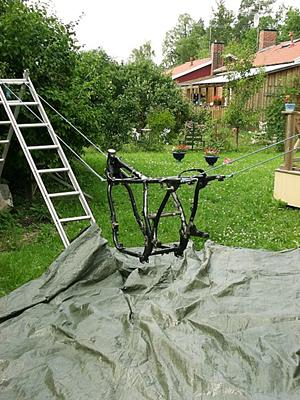
I used a 2-component auto paint, gloss black, here is the result.
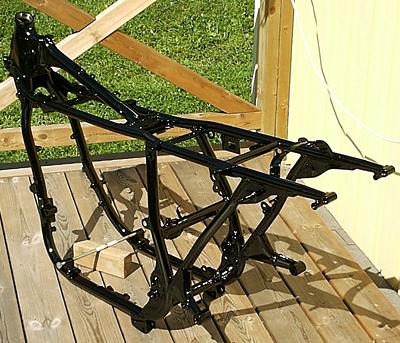
Paint allowed to harden with the help of sunlight. Took more time for the paint to harden than I expected, maybe
I didn't get the amount of hardener exactly right. But after 24 hours I could move it around with no risk for permanent
fingerprints in the glossy black. Result is very good. I've decided to paint the swingarm and stands in this paint
too for a good match.
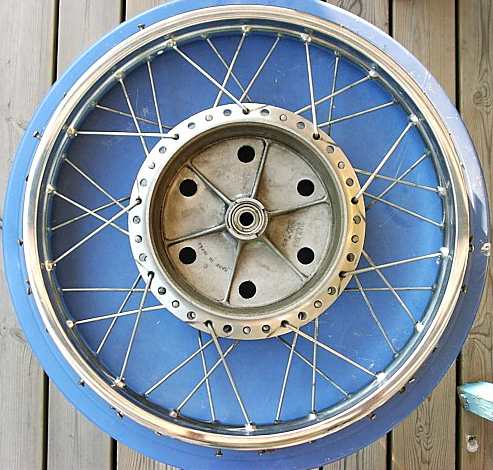
This is not the correct spoke arrangement, and the angles of holes were incorrect.......
Tightening them and getting the wheel in balance was easier than I had expected, maybe I was just lucky. I was
able to get rid of an imbalance I had earlier also. So 'wheel building' might not be such a black art after all,
it just takes time. Got email from Vintage Parts now that they have located a NOS orginal rim for the 4LS hub so
I'm going to fit that one some time in the future.
I'm waiting for a crank I imported early this
year to come back from the 2-stroke machinist (I sent it for checking the balance) before I can rebuild the engine.
I installed gearbox parts yesterday after I finally got hold of the little spring loaded plunger that's falls out
when one unscrews a bolt underneath the engine. I didn't realize it was there when I unscrewed the bolt and it
must have fallen out sometime after that.. I had to order a new one from the U.S ! I noticed the J engine block
does not have a water passage O-ring at the mating surface between the engine case halves (used on later models,
illustrated in the Haynes manual) but there's a plain surface there on my engine. So it will be important to carefully
apply gasket compound around that area.
I was able to repair a problem with a leaking SRIS hose union (at the front of the engine). The union is a press
fit in the cylinder block and I was able to pull the broken one out. New ones have part number
16910-31000 SRIS HOSE UNION @ $A6.50 (from SuziParts).
I had to reinstall the gearbox components I installed yesterday, I checked today to see if the gears would change
correctly and found out the gear selector 'cam drum' was locked up solid ! Took it all apart and it turned out
some thread locking fluid had ended up on the cam drum bearing surface... Now installed again and shifts as intended.
Also I had lost one of the little pegs that locks crankshaft bearings in position but found out it's exactly 4mm
diameter so I could use the back of a 4mm drill bit and cut it to suitable length. Also I had misplaced the piston
thrust washers and new piston pin locking rings and had to spend two hours before I found them, great relief! Now
all seems ready for the reassembly.
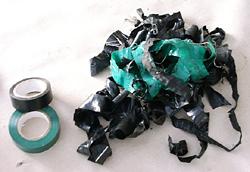
Yesterday I rewound the entire lower wiring harness with new black and green insulating tape to the original appearance
and repaired some bad soldering joints. I found several repairs having done earlier and signs of electrical shorts
suffered by earlier owners. The visual improvement is rewarding. I used acetone to clean the wiring insulation
to get fresh colors back.
I had some progress early this week reassembling the engine
case. Here
are some photos from that session !
I'm not writing a restoration book so I didn't use the camera much, among all the manuals I think the Haynes manual
is the best photo source for this phase of the work. The critical phase was making sure I really had everything
inside the case before I mated the two halves. I double/triple/.. checked everything over and over and I still
pray it's all there. For the mating surfaces I used a liquid gasket product I got from Vintage Parts that is supposed
to replicate the Suzuki Bond #4. All seem promising so far. I think I will install the engine in the frame before
I continue to add more weight to it (cylinder block, etc.)
August 06, 2001
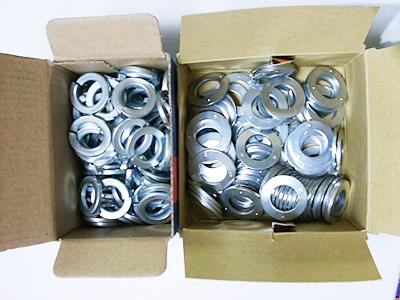
I've aquired a batch of the correct dimension of washers for the head bolts of the GT750 (the original setup
of one plain and one
locking washer). I intend to use these on my engine. These are all zinc plated. The big ones (15mm inner diameter)
are almost impossible to locate in hardware stores in Sweden, I had to drive to a store located 40 miles north
of town to find these. Hoping to pay for the fuel I bought boxes of them to get a good price.
I can now supply eight (8) such complete sets to those who need one.
I noticed in my own restoration almost all of my head bolts look like new to the outside world after cleaning
up, while the washers were all beyond rescue. So by replacing the washers the as-new appearance can be restored.
Such a 'kit' contains 22 main head bolt washers and 16 for the smaller M8 bolts. I need to check the weight before
I commit to a
total incl. shipping. Anybody interested ? Preliminary US$ 10 for one washer kit incl shipping
worldwide. Or get all eight kits for $50 + shipping !
August 08-12, 2001
I got a Caswell plating kit (Copy Cad/Zinc) http://www.caswellplating.com/kits.htm
It makes it possible for the home mechanic to zinc plate parts for a cosmethic as-new appearance and good corrosion
resistance.
The results are amazing.
See this page for a description and photos of the parts I plated !
August 18, 2001
I had sold a GT750 front rim to Gerald on the list and Gerald, I took your advice to have a Guinness literally
!!
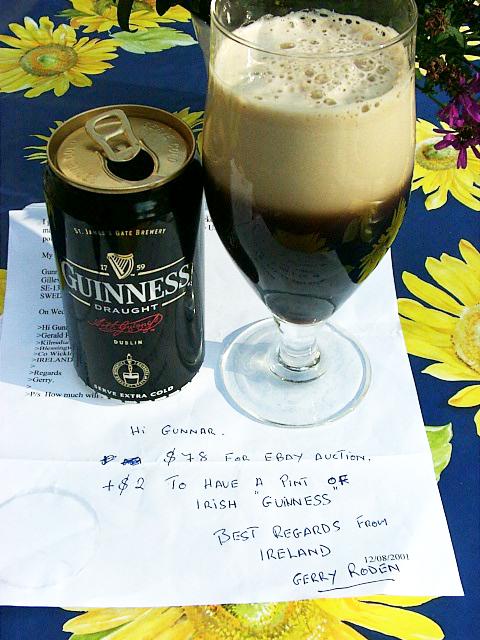
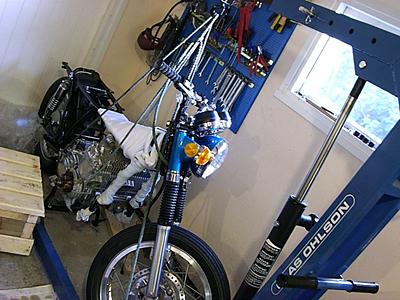
I put together a wooden platform on wheels from where I hope to slide the engine
in place.
I have wrapped the frame tubes to avoid scratches, a car engine hoist will help in the lifting process.
I hope the Guinness have provided the strength I need.
August 20, 2001
I had some more progress in getting my J model back together. I was able to slide the engine into the frame
from a wooden platform on wheels which I made for the purpose. The key to the success (part from that earlier Guinness)
was a car engine hoist I used to lift the engine in ropes while sliding it in place. By letting a pair of ropes
go down on each side of the frame and over to the engine sitting beside the frame, when pulling ropes upwards the
engine was pulled both sideways and lifted upwards to slide off the platform towards the frame. Only some light
hand guidance was needed to have it end up in
the proper position.
Later I got the wiring harness installed, I repainted the plates to which the wiring harness sockets, charger relay
and rectifier is
mounted. I sand blasted and zinc plated it first for possible better corrosion resistance. Lots of other small
items installed. The starter relay looked a bit dull so I immersed most of it into the zinc plating bath.. It came
out quite ok, and still worked. I hope to start then engine up next weekend.
I began installing the Newtronic ignition system this evening. The red cable coming from the sensors point in
the wrong direction with regards to the outlet from the timing housing. But apparently it looks correct for the
GT550. So I moved the sensors around on the plate to get the right orientation for the cable. But then the firing
order changed :-) I figure one could swap around the cables coming into the control unit but there isn't any info
how the five cables from the sensors are really wired up in the circuitry so I didn't want to burn the unit by
trial and error. I simply rerouted the ignition coil high voltage leads so center coil fires right cyl, right fires
left and left fires center. Any future mechanic will find this a mind boggling setup. But the length of the HT
leads seem to be sufficient. It became too late an hour so I didn't finish the timing setup. But I get nice sparks
coming from the correct plugs as I turn the crank now.
I noticed one thing isn't catered for regarding the J/K models. On these bikes the cable from the Neutral switch
indicator by the gearbox is included part of the wiring harness going from the mechanical breaker plate up to the
'electrical connector central' under the left side cover. (Later models have a more complex gear sensor that indicates
individual gears, using a separate cable(?).
So I will need to arrange a separate lead for the Neutral sensing. Otherwise all looks ok.
I've come so far now as having installed the Newtronic and set the timing. I think I will locate the control
unit inside the left
sidecover. I will make a small mounting plate that bolts to the electrical plate, instead of glueing (or 'velcroing')
the unit to the
cover. Obtaining the desired precision timing setting is not as easy as with the metal timing plate of the mechanical
system. In the Newtronic system the adjustment screws are threaded into the glassfibre circuit board so some care
is needed to not overtighten them. Turning the glassfibre 'timing plates' is a crude trial and error job where
you get no support for obtaining a 0.01mm accuracy reading. The more attempts you do the higher the chance that
you happened to tighten the screws at the optimal position. As you tighten the screws the setting changes a bit
also.. This is not something that would withstand many trial-error adjustments until glassfibre threads wear out
but luckily you're supposed to do this once. I think I arrived at fairly accurate settings, at least within some
0.03mm variation on the dial gauge. The optical triggers seem to have a very accurate
repetition of at what location they trigger.
Trick #1: The same trick apply as with the mechanical system: the crank should be advanced using a spanner on the
alternator side, or using the kickstarter, or turning the rear wheel in 5th gear. Not by turning the 'timing shaft'
itself. There is a small slack in the
coupling between starter clutch and timing shaft. The resulting readings on the gauge of at what point the ignition
fires will differ
up to 0.1mm or so depending on if you turn the crank or the timing shaft so it's significant. Remember when the
engine runs it's the
crank that drives the timing shaft and not the other way around so the same method should be used when checking
the timing.
Trick #2: I noticed when using a dial gauge on the outer cylinders the readings can be abit unreliable due to inevitable
play and wear
in the gauge. Because the piston force is applied a bit sideways to the gauge contact point then the gauge get
a sideways force that
increases friction in movement. If the gauge has some wear (due to earlier abuse) the movement can be a bit jerky.
By tapping on the plug adapter with a screwdriver while the timing is advanced you can make sure the needle settles
at a correct reading both when zeroing the gauge at TDC and when dialing in the desired 3.64mm-before-TDC position.
I come to think of one change I made during the carb rebuild; I changed the float levels. The Suzuki "GT750 Service Manual" (Publication 99500-17001-01E) consists of two sections, the first on corresponds to the content of a "Engine Service Manual" (which at some point in time was also available also as a separate manual, I have both), and the second pars is labelled "SUZUKI Service Guide Model GT750". See the two attached schematics, one from each of these two sections. The first one shows the one from the Engine Service Manual. It attempts to illustrate how to adjust the float levels.
The impression any mechanic would get is that the level is to be measured from the raised side edge of the carb
body. So those who adjust according to that picture will set a lower fuel level in the chambers. BUT, another figure,
from the Service Guide, shows that the measurement shall be done from the mating surface (or 'gasket surface')
for the float chamber rather than from the raised side edge ! That's quite some difference and would result in
a higher fuel level :
I suggest following this second picture.
I found when I adjusted the float levels (I had never cared about that before) that one float had another setting
than the other two. I
adjusted all three according to the SECOND figure (27mm). I suspect that the adjusted float levels can have something
to do with
the reduced bucking. At least that it is important to have the SAME adjustment on all carbs. I suggest those who
have an annoying bucking problem make sure the float settings are correct and equal on all three carbs, I suggest
using the SECOND figure.
I can't guarantee this will be a cure but I suggest it's worth an attempt. Could be that the Newtronic has some
magical effect as well
but I can't see how it alone would reduce the bucking problem.
I took some more pictures, see the section "Ready for
the Road" on this page
It was a bit dark (7.30pm) for photos but the bike looks nice now. I haven't polished the cylinder sides, I think
I will be able to do that at a later time without removing anything. The seat made by Eldorado (Tony O'Connor)
is installed in these pics.
Some final rebuild daylight photos will arrive soon.
Now have the correct jets, 100 center, 102.5, Left + Right.
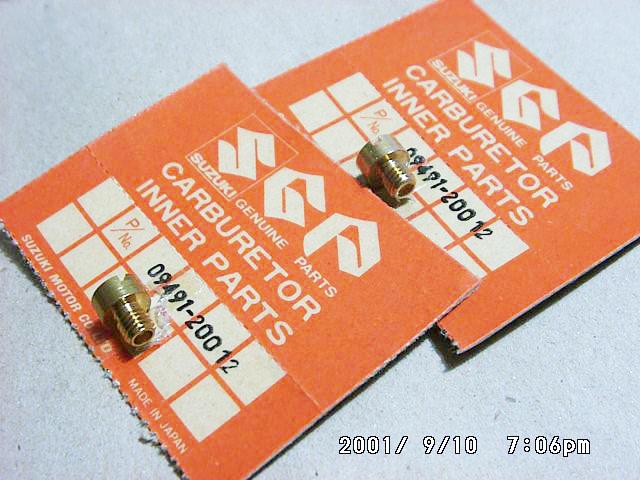 #100 |
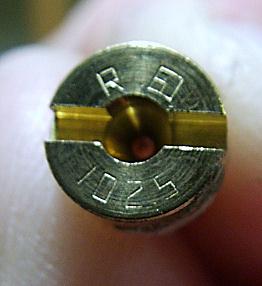 #102.5 |
|
|
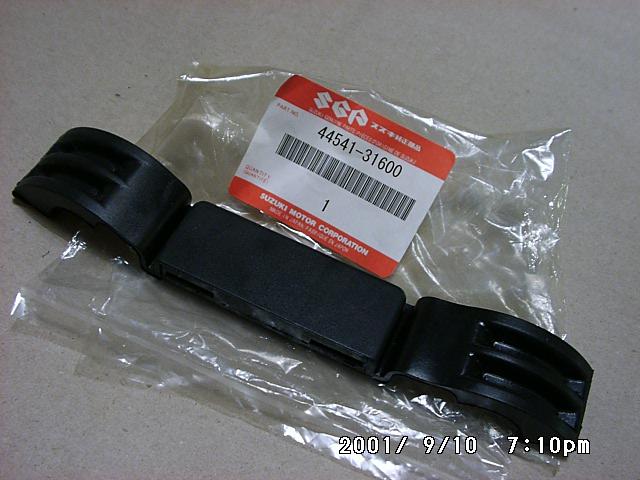 Rear tank cushion |
|
|
|
||
I had the carbs out again to install the 100 and 102.5 size jets to replaced the 90/92.5 ones that was in my carbs earlier. This had a clear effect on engine characteristic ! Noticeably louder/more powerful exhaust note on low revs, the engine seems more agile. Reminds me a bit of a snowmobile engine :-) Constain rain weather has prevented any road tests after this installation so far.
I did some road testing, nothing wrong with performance ! But I think I have too much engine
vibrations and I decided to have the crankshaft assembly be subjected to a full rebuild!!!!. Below are some pictures
from before I took it apart again.....
 |
 |
||
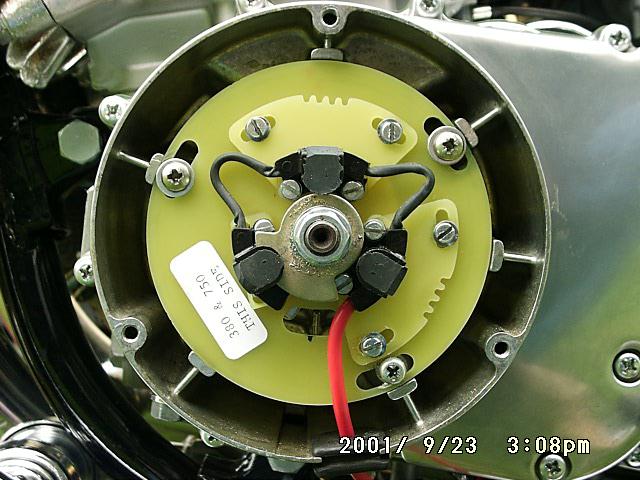 Newtronic timing plate |
Removed engine, disassembled engine, removed crankshaft...
October 12, 2001
I now sent the crank and a set of bearings and seals to EBOS (http://www.ebos.se)
for a full rebuild.
As soon as I get it back I will reassemble and install the engine again.
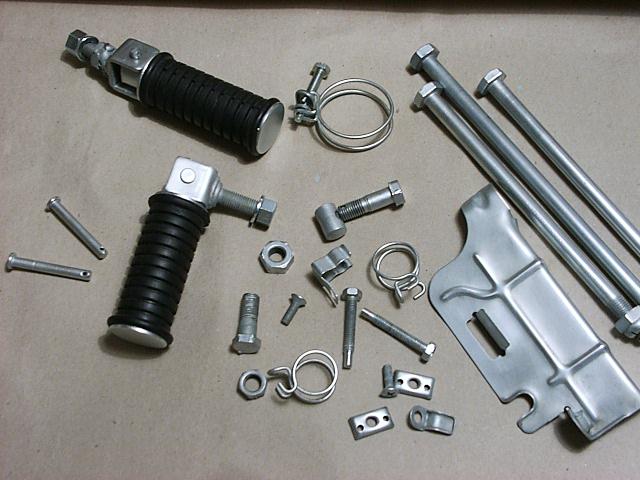
Some pictures of parts from Paul Miller :
|
|
|
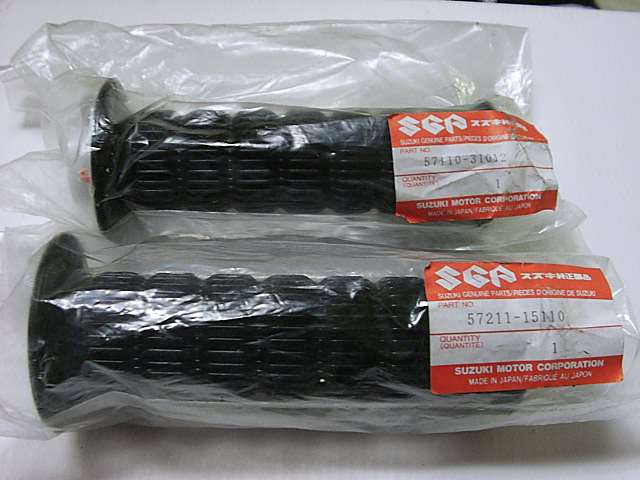 Throttle grips (SuziParts) |
|
|
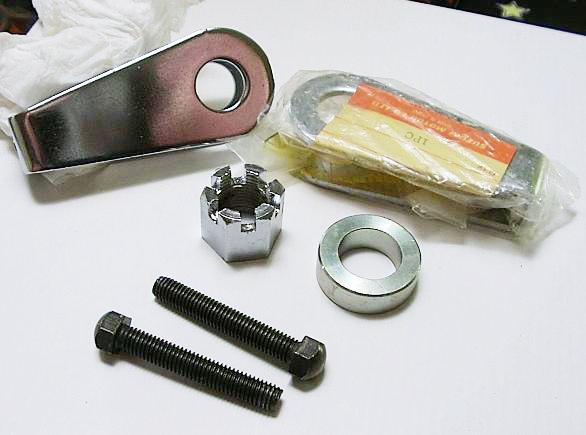 Chain tensioner, spacer and wheel nut, (bolts from SuziParts) Chain tensioner, spacer and wheel nut, (bolts from SuziParts) |
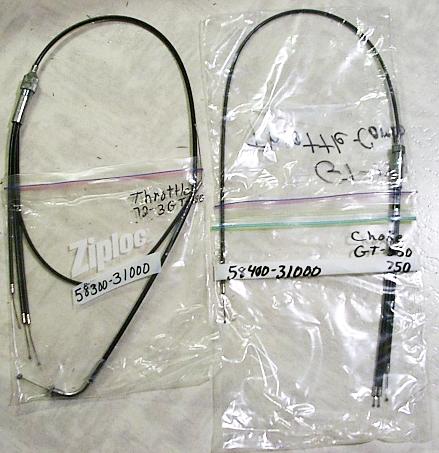 Throttle and Choke cables (TSK brand) |
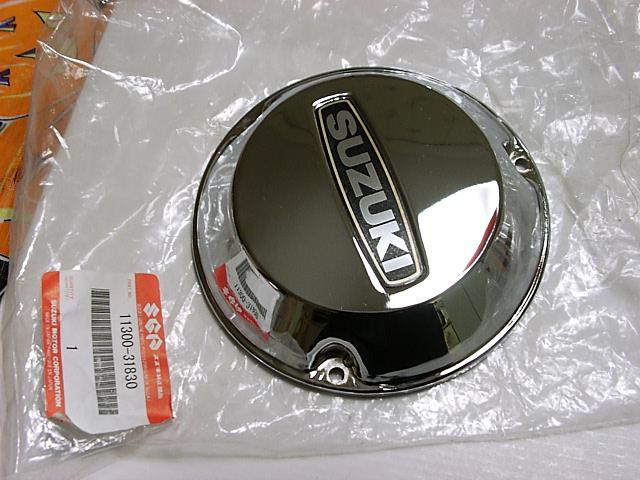 NOS Timing cover - a cosmethic restoration item 'won' in dog-to-dog fight on Ebay..... |
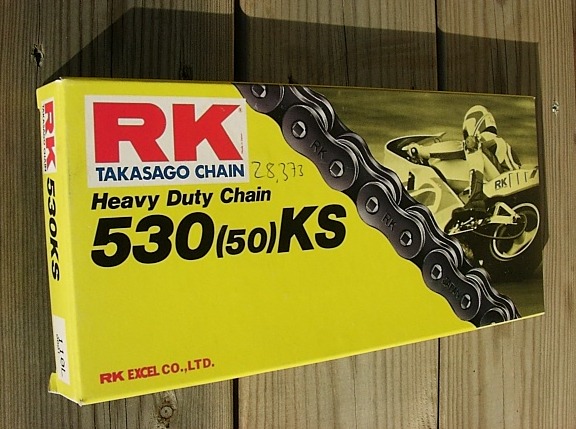 This drive chain seems to fit the GT750 well (local bike shop) |
|
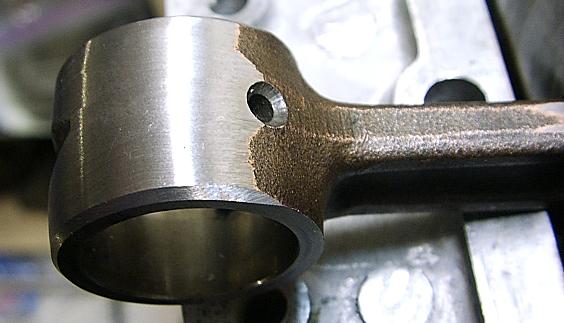
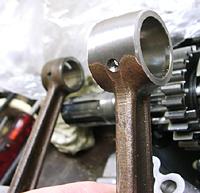
The crank is back! During the rebuild they found that the difference in weight between the lightest and heaviest connecting rod was 10 grams ! That may explain the vibration problems, so I have some expectations for a happy ending.
These pictures show evidence of the work done on removing weight from two of the conrods :
|
|
|
|
|
|
|
|
|
|
This picture shows a lightened rod and |
I only have time to spend on this now and then late in evenings.
Crank installed, case halves together, pistons/cylinder block installed.
But I'm waiting for some good parts to arrive that has appeared for sale.
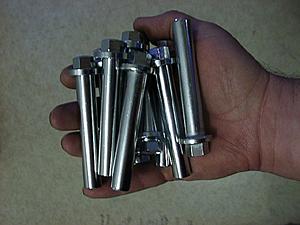
I'm hoping to be able to install a set of new head bolts and
am waiting for a new set of case screws.
I'm also waiting for a NOS oil tank from vintage parts
and a new set of exhaust pipe flanges.. but there's no hurry,
we are entering the winter season, four to five more months until it's time for the road again.
Still waiting for some parts to arrive that are good to install when I have the engine apart.
Clutch and Starter clutch installed.
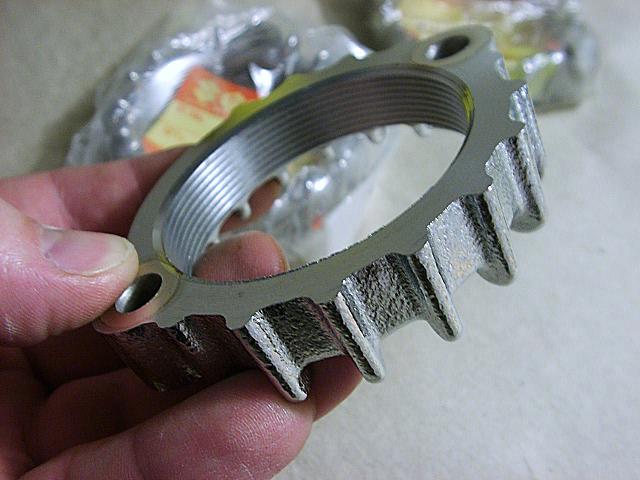
In the meantime, here's pictures of some GT750 NOS goodies from (V)Vintage Parts, (P)Paul
Miller and (S)SuziParts :
There's something special about Suzuki GT NOS parts and that they can still be obtained...
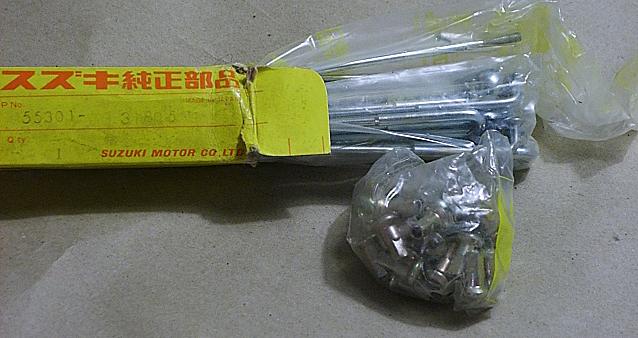 NOS front spoke set for drum brake hub (P) |
|
 Exhaust pipe flanges of the 2nd type with smaller fins (V) These are difficult to find and expensive |
|
|
|
 |
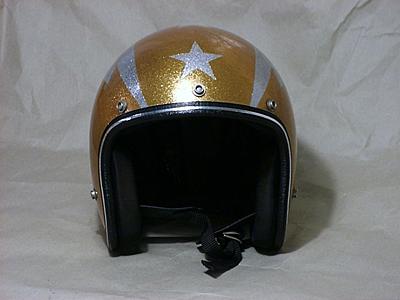 This original 70's flake helmet is cool ! Essential equipment for a classic 70's appearance. I found it on Ebay and intend to use it for classic bike meets :-) In X Large and no scratches, that is an unusual combination. |
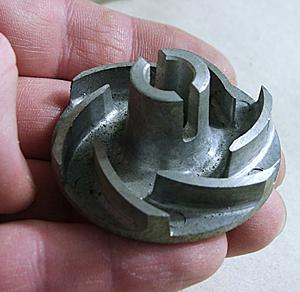 Water pump impeller (V) to fit a pump I bought earlier this year |
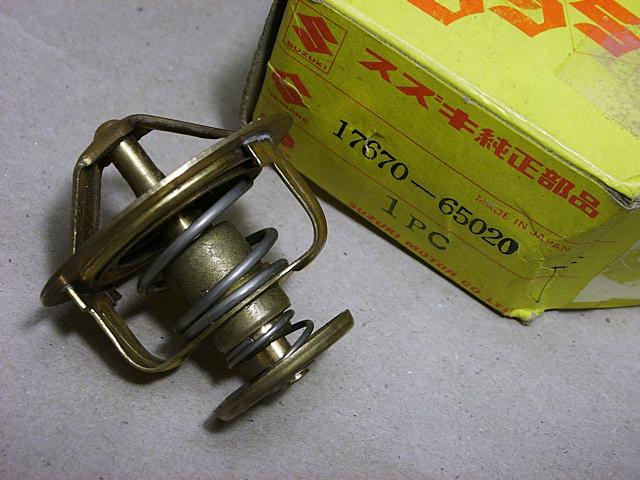 Thermostat (V) |
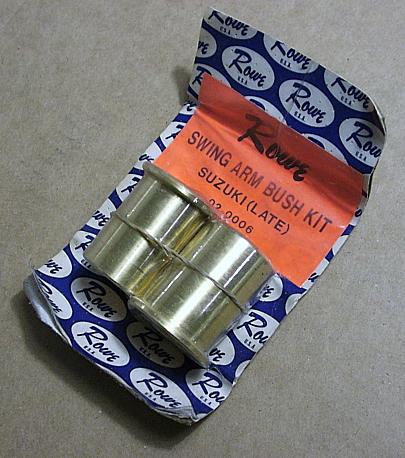 Rowe brass swingarm bush kit (Ebay) |
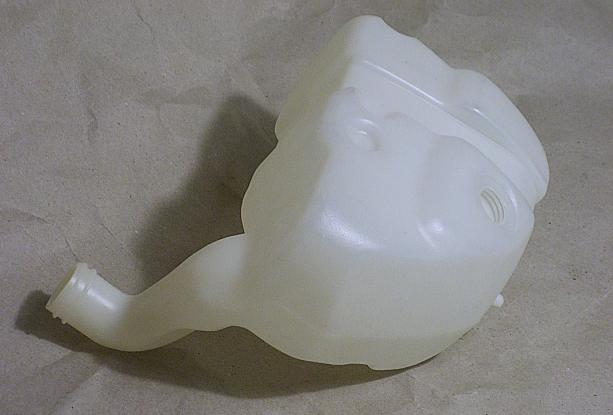 NOS Oil tank (V) |
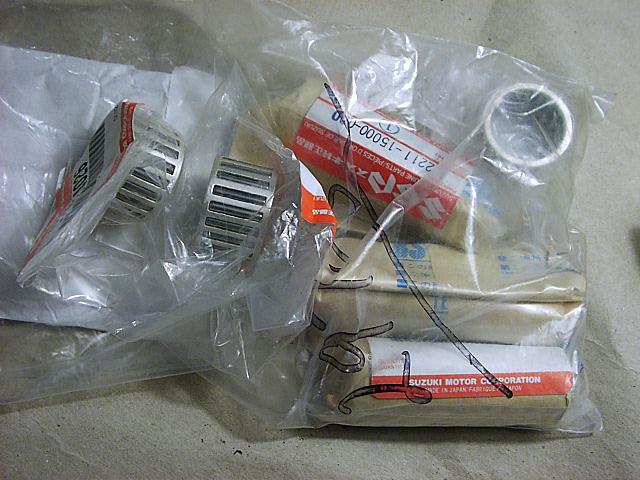 Crankshaft big end bearings, pins, shims ! (S) For use sometime in the future |
 'Decent replica' head bolt washers from Swedish hardware store |
|
January 06, 2002
No engine reassembly progress, still waiting for head bolts and many other items from Paul Miller that he now claims he sent surface mail... Some 7-8 weeks of waiting so far...
Most of the parts from Paul Miller arrived now, including the NOS chrome head bolts so I can now continue with the J engine reassembly.
I brought a second GT750 home !
I've imported a GT750L from California that I bought from Ray Meyers in Monterey. We agreed on the deal last summer in June but it was not until December 2001 that it became time to have it shipped. Ray was kind to hand it in at a shipping agent in Oakland outside San Francisco. It took one month to ship it overseas. I will use it as a fun 2nd bike and so far the restoration ambition level is not on the level of the J. It runs and rides very good, it's the best riding GT750 I have tried so far including the J. It needs no internal engine work. I will restore it cosmethically over time (seat cover, misc chrome trim, new paint on tank/covers, emblems, gauges, detailing of controls and painted items, zinc plating of various little metal items), engine polishing, etc.
All restoration work on the L and what happens to that bike will be documented on the
Gunnar's GT750L page from now on.
Please go there if you need any onfo about what happens to the L. This restoration log will continue to deal with the J model.
Back on track with the J !
Reassembly continued today. Hope to have the bike ready to start up tomorrow.
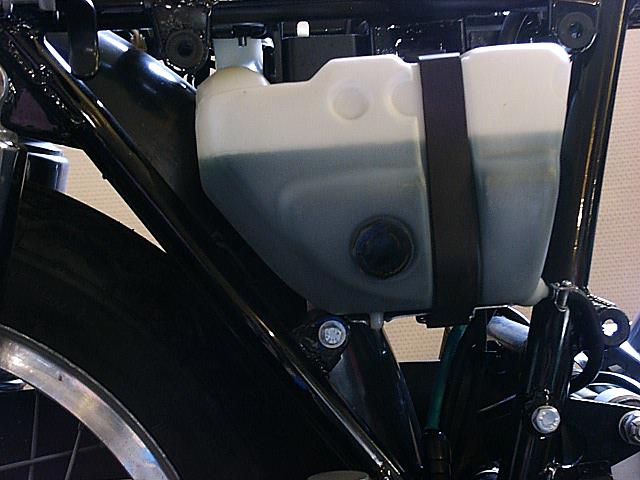
I also installed a NOS oil tank (see photo). I filled it with TORCO Smokeless, a synthetic
2-stroke oil that I will try using.
I got carbs installed + air box and finally that dreaded rubber boot between carbs and air box. Very exhausting
! Installing that rubber thing is the hardest part of a GT750J restoration including any of the engine work ! There
are several systems of this bike that need to work for a successful rebuild so I am keeping fingers crossed that
I'll suceed this time. I hope I will not have to tear this engine down again...
Done!
Bike is ready, traffic approved and I have been running it in for 300 kilometres so far.
No leaks, I have been using breaker points for a while but will switch back to the Newtronic,
The breaker points require setting the timing too often.
Some final photos soon.
In the meantime,see these photos from the previous reassembly attempt last year, it looks exactly the same now.
I haven't had time writing about this bike for a while, all that belongs to the area of riding/using it. See
this photo report
from an enjoyable trip to Norway in May 2002 ! I haven't had
any major trouble with the bike.
From a mechanical point of view I will at some point have the engine out once more to try to reduce crank vibrations
but for now I spend any spare time for motorcycles on the GT750L
project.
I'm still here and the bike is in the same shape as before.
The original crankshaft which I replaced when I rebuilt the engine is now rebuilt by a talented swede (I will know after installing it if the whole job was a success) so I will take
the engine out this winter and install this crank. I then hope to get the engine characteristics I want.
This summer was all about finishing the
L project. But I now improved on the J with the original handlebars same as I use on the L. From Paul Miller
Ebay auction, $59 + shipping
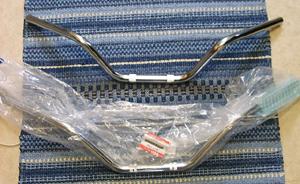
Old and new
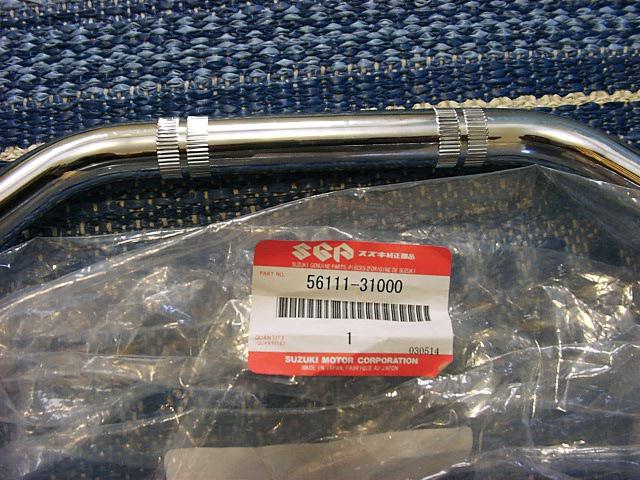
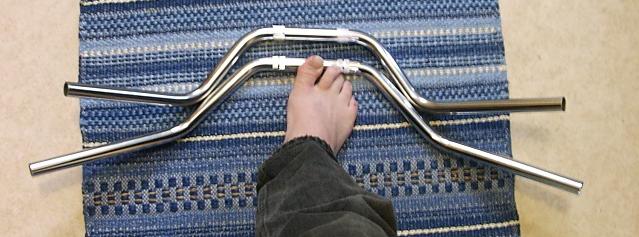
Here you can see the difference clearly
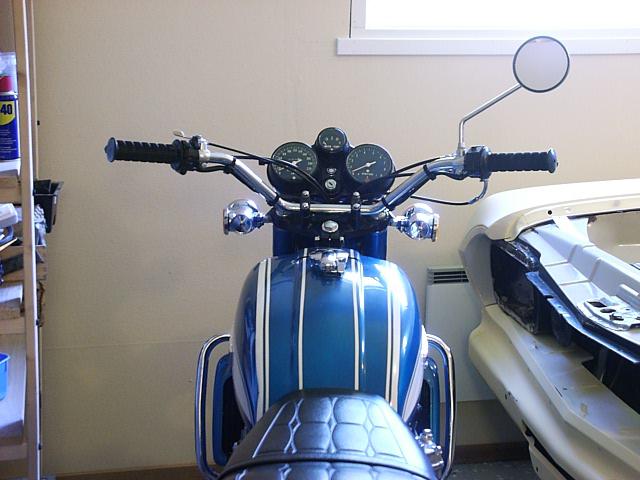
And here it is now on the bike, I like this wider style.
Still here and everything is in the same shape except an oil leak from the oil tank indicator lens. The NOS oil tank has some casting imperfections in the plastic which causes the leak. Yet another rubber gasket ordered from GTReiner which will fix this.
I found no time for any bike work this winter but in a few weeks I will begin an engine teardown to install the original crankshaft that I have had restored. The compelling goal is to try to accomplish less engine vibrations so that riding the J will be fully enjoyable.
I finally found some time to tear things apart. It went quicker than expected and in an afternoon and evening I advanced from a complete bike until the engine was out.
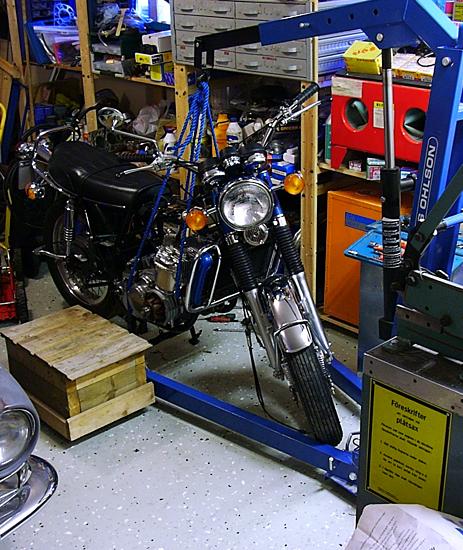
Ready for lifting the engine out.
And with some help from a female family member operating the lifting equipment I was able to pull the engine out
to the right onto a platform on wheels.
Ok, as if this was not enough, here is a GIF animation too, enjoy ! :